This step by step tutorial demonstrates how to extract the logic of synchronous and asynchronous state management out of a React component and write more scalable and reusable React code.
The Pet Clinic App
In this tutorial, we will begin with an already functioning application. The application is very straightforward. Assume you are a veterinarian in charge of a pet clinic. Be aware that this will be a game-like app rather than a resource management system for your pet clinic.
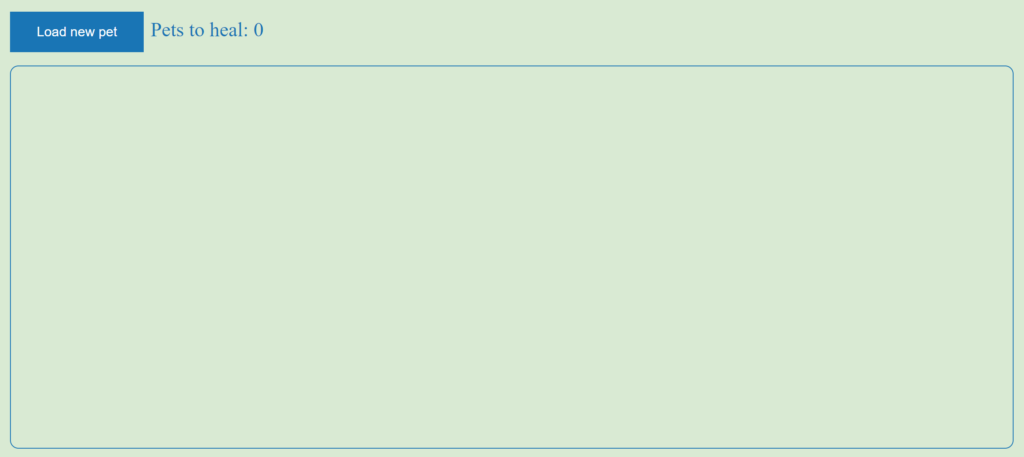
The pet clinic appears to be empty at first, as no sick pets have arrived.
When you press the “load new pet” button, an asynchronous function is invoked to load a pet. An egg will appear while the pet is loading.
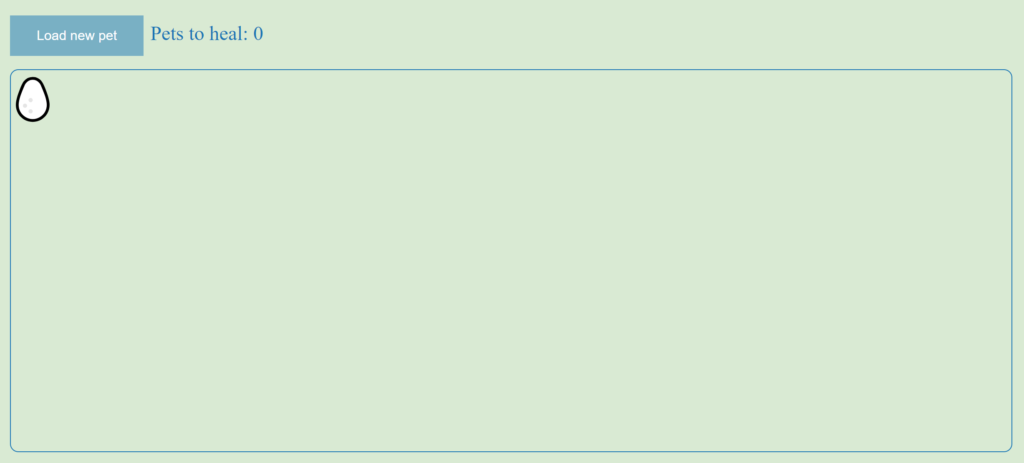
That’s right, all of the pets in our fictitious clinic arrive in the form of eggs. When the egg hatches, the poor sick pet will be there, ready to be healed.
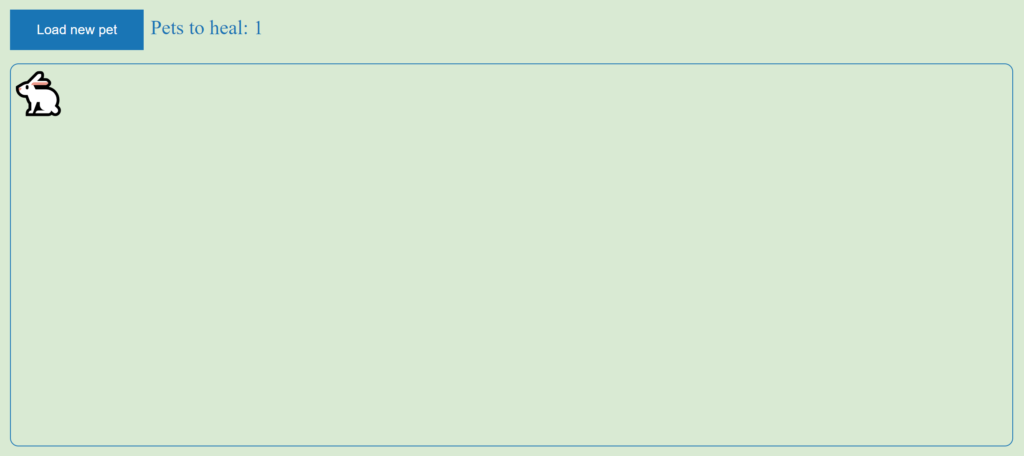
The number next to the “pets to heal” label has also been updated. You can keep clicking the “load new pet” button, and new pets will be loaded.
If the asynchronous function fails, a warning symbol will appear instead of a pet.
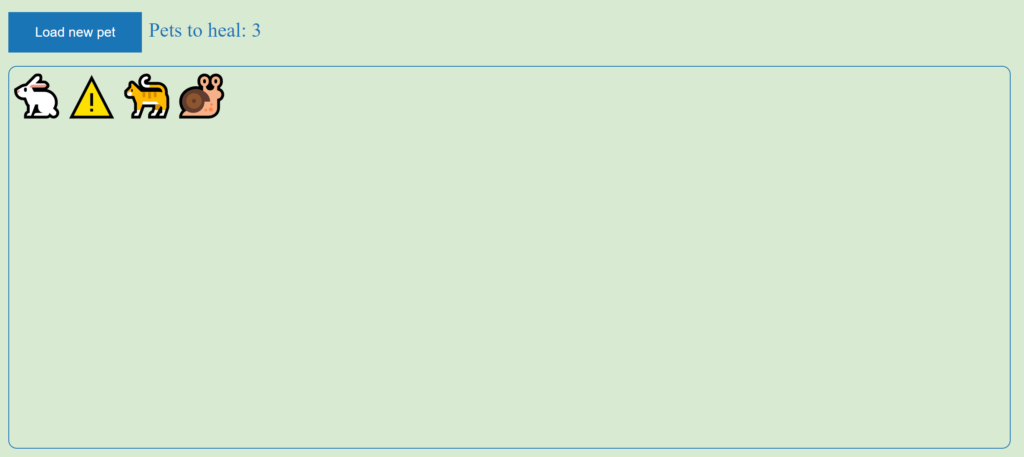
You’ll also notice that the warning symbol doesn’t change the “pets to heal” count. To heal a pet, simply click on it and it will vanish.
If you wish to play around a little bit before moving into the technical details, you can visit the following GitHub page.
The React component
To code along with this tutorial you can clone this repository.
Then, checkout to the commit with the initial working version:
$ git checkout 578a1c0Open your favourite code editor and have a look at the files inside the src folder:
- api.js: This file contains an asynchronous function that returns pet objects or an error.
- App.css: CSS code for the design of the pet clinic.
- App.jsx: The main application code.
- main.jsx: The entry point.
The file we will emphasize is the App.jsx file, which contains the main React component:
export function App() {
  const [pets, setPets] = useState([]);
  const [egg, setEgg] = useState(null);
  function onLoadPet(e) {
    e.preventDefault();
    setEgg(loadEgg());
    loadPet()
      .then((pet) => {
        setEgg(null);
        setPets([...pets, pet]);
      })
      .catch(() => {
        setEgg(null);
        setPets([...pets, loadError()]);
      });
  }
  function healPet(id) {
    setPets(pets.filter((p) => p.id !== id));
  }
  function countPets() {
    return pets.filter((p) => !isError(p)).length;
  }
  return (
    <div className="container">
      <button disabled={!!egg} className="loading-button" onClick={onLoadPet}>
        Load new pet
      </button>
      <span className="pets-to-heal">Pets to heal: {countPets()}</span>
      <div className="clinic">
        {pets.map((a) => (
          <Element
            key={`pet-${a.id}`}
            id={a.id}
            code={a.code}
            onClick={healPet}
          />
        ))}
        {egg && <Element key={`egg-${egg.id}`} id={egg.id} code={egg.code} />}
      </div>
    </div>
  );
}

function Element({ id, code, onClick }) {
  function handleClick() {
    onClick?.(id);
  }
  return (
    <span
      onClick={handleClick}
      className={`element ${onClick ? "clickable" : ""}`}
      dangerouslySetInnerHTML={{ __html: code }}
    />
  );
}
This is a lot of code to process, so let’s break it down into smaller chunks.
The component’s state definition is visible at the top of the component code. The list of pets is what the component requires to dynamically render them, and the egg is defined when a pet is loading, otherwise it is null:
const [pets, setPets] = useState([]);
const [egg, setEgg] = useState(null);
If we scroll a bit down we can see how the pets and the egg are rendered:
<div className="clinic">
  {pets.map((a) => (
    <Element
      key={`pet-${a.id}`}
      id={a.id}
      code={a.code}
      onClick={healPet}
    />
   ))}
  {egg && <Element key={`egg-${egg.id}`} id={egg.id} code={egg.code} />}
</div>
Both pet and egg are rendered as an Element component. The pets have a click handler, that calls the healPet function.
This function takes the pet id as a parameter and removes it from the pet list:
function healPet(id) {
  setPets(pets.filter((p) => p.id !== id));
}
Another important element is the load button:
<button disabled={!!egg} className="loading-button" onClick={onLoadPet}>
    Load new pet
</button>
It is disabled while we are on loading state (an egg is there) and it has a click handler that calls the onLoadPet function.
This is a function with some simple asynchronous logic:
function onLoadPet(e) {
    e.preventDefault();
    setEgg(loadEgg());
    loadPet()
      .then((pet) => {
        setEgg(null);
        setPets([...pets, pet]);
      })
      .catch(() => {
        setEgg(null);
        setPets([...pets, loadError()]);
      });
}
The loadPet function is an asynchronous function that either returns a pet object or throws an error. We set an egg before calling the loadPet function (loading begins). If we receive a pet as a result, we add it to the pet list. Otherwise, we add an error object to the pet list. In both cases, we eventually remove the egg (loading ends).
Finally, we have a function that returns the number of pets:
function countPets() {
  return pets.filter((p) => !isError(p)).length;
}
It is equal to the length of the pets list if we filter out the errors.
Decouple logic from view
You’ll notice something if you look at the main component again. The asynchronous and state management logic, as well as the code to render the component, are all contained within the component itself.
For this small application, this isn’t a big deal. In fact, starting a React component with logic like this is perfectly acceptable if you want to quickly test how it works or if you want to keep it small forever.
You will only notice the issue when you want to scale up. If we wanted to add more entities or expand our pet clinic into a pet clinic and pet shop, we could write more logic for it. Then we realize we need to write more code, which is where the complexity comes into play.
And, as you’re probably aware, complex code attracts bugs!
Also, complex code is difficult to manage and leads to code duplication, which we do not want! We need reusable code, and in order to have reusable code, the logic must be separated from the view!
This is called Separation of Concerns (SoC), a design principle that separates the code into smaller chunks, each chunk responsible for one thing. So let’s make it happen!
One way to decouple the synchronous and asynchronous logic out of your react component is by using the Redux library and utilize the Redux Thunk middleware.
Integrate Redux
In our example app we will demonstrate the solution, using the Redux Toolkit, the standard way to write Redux logic with a batteries-included toolset. This means we don’t have to include and integrate the Redux Thunk middleware, it’s already there!
By the way, for those interested in the meaning of the name Thunk, it’s a term that has been used in computer science for years (since the ALGOL 60 programming language) and refers to a subroutine that is used to inject a calculation into another subroutine. The term originated as a whimsical irregular form of the verb think. Read this Wikipedia article for a short break, else keep coding.
Enough with the theory, let’s get our hands dirty!
Start the integration by installing Redux Toolkit and the React binding:
$ npm install @reduxjs/toolkit react-reduxCreate a file called store.js and define an empty store:
import { configureStore } from "@reduxjs/toolkit";

export const store = configureStore({
  reducer: {},
});
Then, open the main.jsx and provide the store to your app:
import { store } from "./store";
import { Provider } from "react-redux";

ReactDOM.createRoot(document.getElementById("root")).render(
  <Provider store={store}>
    <App />
  </Provider>
);
Redux Toolit has now been installed and made available to our app. We will use a two-step procedure to gradually extract the logic from the component. The steps we must take are as follows:
- define a state slice and write actions for the synchronous logic
- define a redux thunk to handle the asynchronous logic
Create the slice
In order to start writing logic we need a slice with an empty initial state.
Let’s first create a file called clinicSlice.js and define an empty slice:
const initialState = {
};

export const clinicSlice = createSlice({
  name: "clinic",
  initialState,
  reducers: {},
});


export default clinicSlice.reducer;
We can now ask ourselves, how will the initial state look like?
We have a pet list and an egg for the loading state, so we can define an initial state like this:
const initialState = {
  pets: [],
  egg: null,
};
Reducers are also part of a slice in the redux toolkit. A reducer is an immutable function that modifies the current state without causing any side effects in response to an action.
In the redux toolkit, reducers are defined using arrow functions. The first argument is the current state, and the second argument is the action that was taken.
A typical reducers looks like this:

Reducers are defined inside the “reducers” attribute of the slice.
We can now answer the question, in which ways do we need to interact with the state?
- set the loading state
- load a pet
- add an error
- heal a pet
We can now translate the above into reducers:
reducers: {
    startLoading: (state) => {
      state.egg = loadEgg();
    },
    addPet: (state, action) => {
      state.pets.push(action.payload.pet);
      state.egg = null;
    },
    addError: (state) => {
      state.pets.push(loadError());
      state.egg = null;
    },
    healPet: (state, action) => {
      state.pets = state.pets.filter((p) => p.id !== action.payload.id);
    },
},
And export them, so that we use them in the React component later:
export const { startLoading, addPet, addError, healPet } = clinicSlice.actions;
We are now ready with the slice. Let’s integrate it in our store.js file:
import clinicReducer from "./clinicSlice";

export const store = configureStore({
  reducer: {
    clinic: clinicReducer,
  },
});
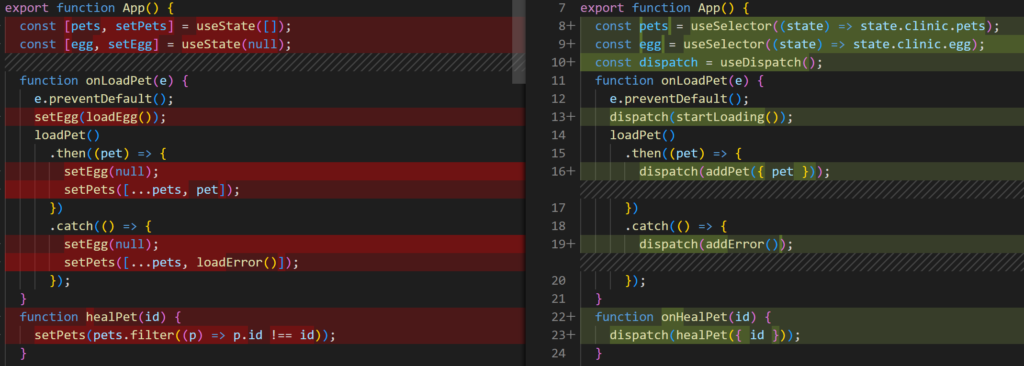
Instead of managing state updates internally, we can read the state using selectors and dispatch actions in our React component. Thus, in App.jsx, we will rewrite the upper part of the React component to use state selectors and dispatch actions:
const pets = useSelector((state) => state.clinic.pets);
const egg = useSelector((state) => state.clinic.egg);
const dispatch = useDispatch();
function onLoadPet(e) {
  e.preventDefault();
  dispatch(startLoading());
  loadPet()
    .then((pet) => {
      dispatch(addPet({ pet }));
    })
    .catch(() => {
      dispatch(addError());
    });
}
function onHealPet(id) {
  dispatch(healPet({ id }));
}
We abstracted the logic of manipulating the pets list into meaningful functions that are dispatched, as shown in the diff:
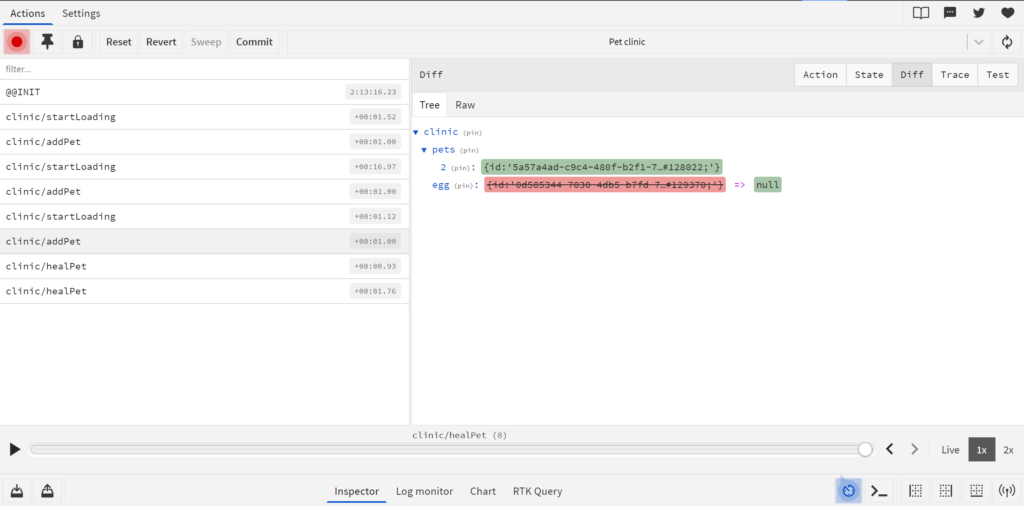
Another cool feature is that we can view the actions and see the state diffs after each action, if we have the Redux DevTools installed:
The asynchronous function, however, remains the elephant in the room. The asynchronous handling must be abstracted into a dispatchable action. Here’s where Redux Thunk comes in.
Create a Thunk
A typical Redux Thunk is used to:
- read from the state
- dispatch actions to the state
- run asynchronous logic
And it looks like this:

We can move the asynchronous logic out or the React component and write it inside a Thunk:
export const loadPetThunk = () => async (dispatch) => {
  dispatch(startLoading());
  try {
    const pet = await loadPet();
    dispatch(addPet({ pet }));
  } catch {
    dispatch(addError());
  }
};
And this is how easy we have created our first Thunk!
Now, we can just use it like a typical action:
function onLoadPet(e) {
  e.preventDefault();
  dispatch(loadPetThunk());
}
And all the asynchronous logic is decoupled from the Component!

As a final step, we can write the functions as arrow function, because they are smaller now, so the final component will look like this:
export function App() {
  const pets = useSelector((state) => state.clinic.pets);
  const egg = useSelector((state) => state.clinic.egg);
  const dispatch = useDispatch();
  return (
    <div className="container">
      <button
        disabled={!!egg}
        className="loading-button"
        onClick={() => dispatch(loadPetThunk())}
      >
        Load new pet
      </button>
      <span className="pets-to-heal">
        Pets to heal: {pets.filter((p) => !isError(p)).length}
      </span>
      <div className="clinic">
        {pets.map((a) => (
          <Element
            key={`pet-${a.id}`}
            id={a.id}
            code={a.code}
            onClick={() => dispatch(healPet({ id: a.id }))}
          />
        ))}
        {egg && <Element key={`egg-${egg.id}`} id={egg.id} code={egg.code} />}
      </div>
    </div>
  );
}
You can view the final code of this tutorial in this GitHub repository.
Conclusion
This tutorial demonstrated how to use Redux to extract logic from React components step by step. We completed the asynchronous logic by extracting it in a Redux Thunk.
If you need more complicated asynchronous logic, consider using one of the following alternative libraries:
The RTK Query is more powerful than Thunks and the Redux Saga is the most powerful.
I hope you had fun with this tutorial and learned something useful.
